A link to our Shop

At times we have to choose between the path that is conventional and the path that is not. In today's world that once worn path that our great grandparents traveled is so overgrown and forgotten that it barely exists. Our goal is to reforge that forgotten path and make it new again.

The Family Eggers

The Family Eggers

Wednesday, October 9, 2013

Fall Foraging part 1


Our foraging has increased in intensity as the cooler fall weather sets in.  The trees are dropping their nuts and fruit.  Fall mushrooms are appearing en masse.  Last weekend we collected the following:

Hen of the Woods Mushroom (HOTW):  One of our favorite Autumn finds.  These large bracket fungi appear around oak tree trunks and stumps.  This past weekend we collected three different hens weighing in at a combined 6lb. There is a park filled with oak trees near our neighborhood and we were able to find these beauties in abundance.  HOTW can be prepared like almost any mushroom and we use them in a lot of different recipes.  They can be sautéed and frozen or dried for long term storage.  Many of our recipes use HOTW.  See last year's HOTW post.
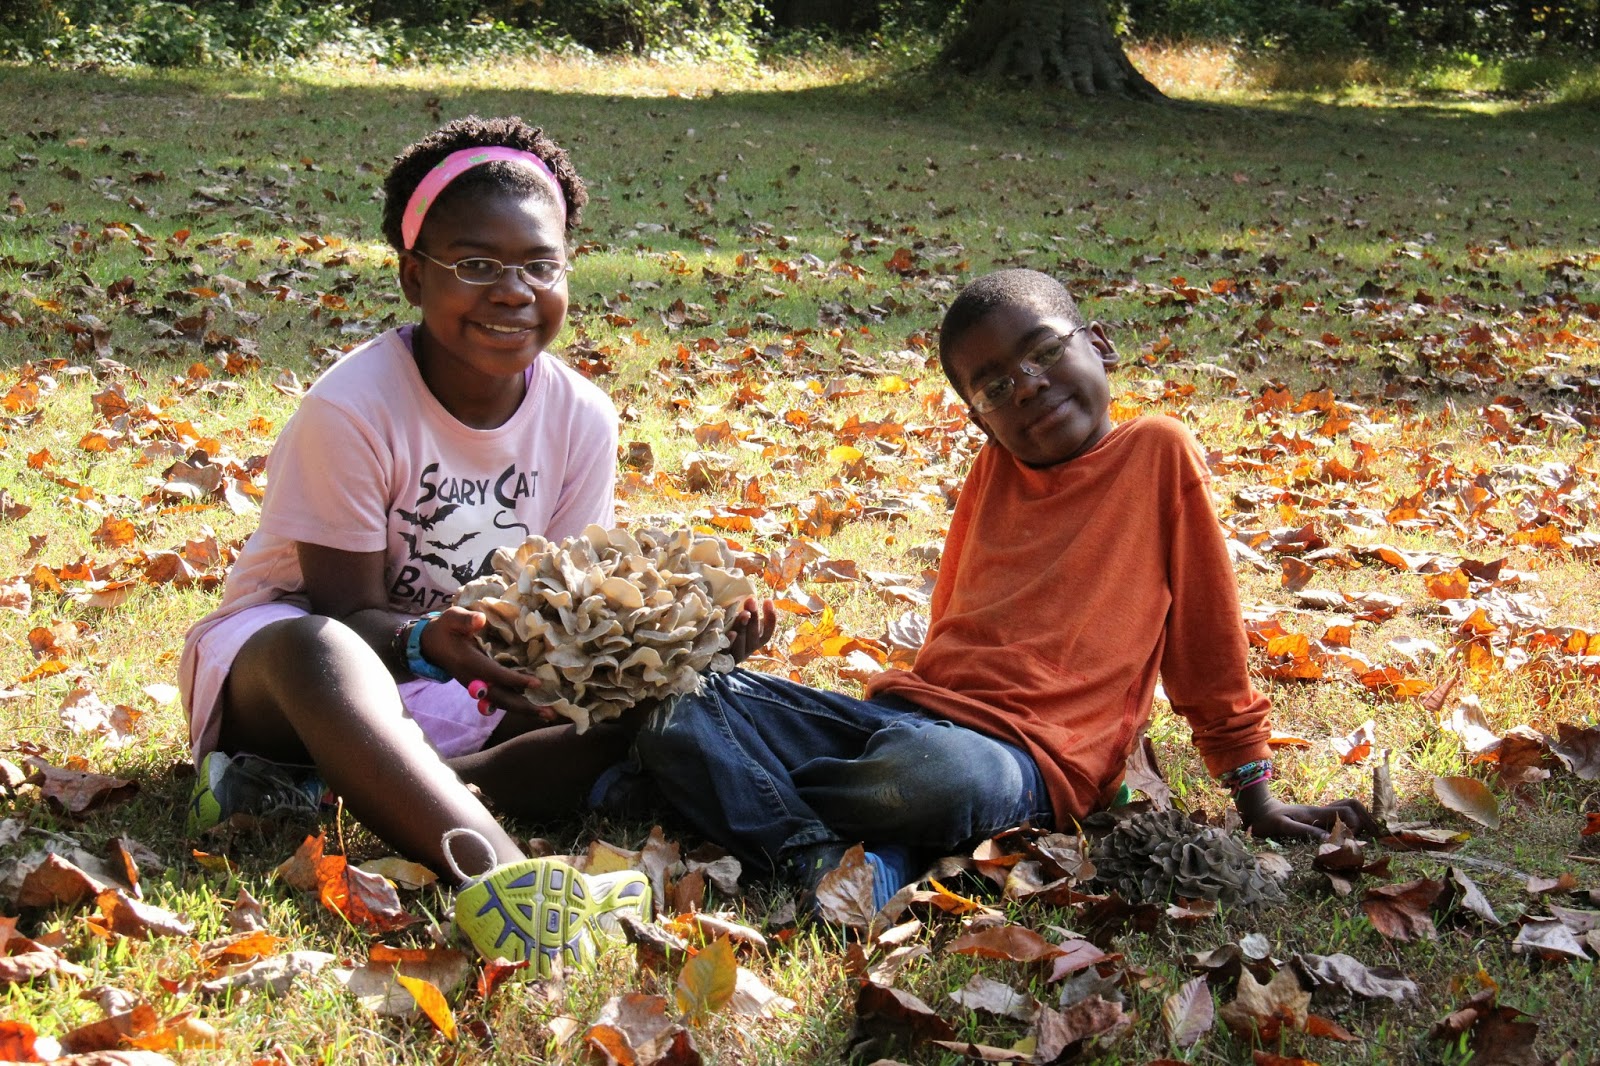
Marie is holding the largest with a smaller HOTW beside Mackenson


Acorns:  Acorns are a food that are commonly ignored by the majority of folks, foragers included.  We were able to collect about two gallons of acorns thanks to Marie and The Nut Wizard®.  Acorn processing is a bit of a trick, so stay tuned for an entry about this process.

Pear shaped puffball mushrooms:  These are a new foraging item for us.  They are a choice mushroom found on decaying logs.  We found a large cluster of these delicacies, but unfortunately were about a week late on the find.  The majority of these were past their prime and we wound up with only a few that were still edible.  These few were sautéed for our Sunday brunch.
Puffballs:  One with the holes on top are old and have already released their spore (not palatable).

Walnuts:  Black walnuts litter the ground everywhere in the fall.  Most people find these to be a menace in their yards and on their sidewalks.  With the proper tools and motivation they are delicious.  We have specialized tools for collecting as well as cracking.  We collected 15 gallons of these beauties with the help of the The Nut Wizard®.  More to follow on the processing (cracking) and storage.

Pears:  Though technically not a foraged (wild) food, we reconnected with last year’s supplier (thanks Teri).  Teri has two huge pear trees that are dropping their fruit.  We were able to collect about 10 gallons of pears in about 15 minutes.  However, these pears are not of quite the same quality that you find at the supermarket.  They are bruised, blotchy and bug ridden (but FREE).  Cleaning is a little more work, as all of the bruises and buggy areas have to be removed along with the core and stones.  Needless to say there is a lot of compost generated and our red wigglers in our worm bin were quite happy.  We still managed to have enough pears for freezing in slices (for smoothies, oatmeal, etc.) and making 6 ½ quarts of pear sauce.  We also froze enough pureed pears to make 3 more quarts of pear sauce.  Stay tuned for the pear sauce recipe, as it is extraordinary.

We filled our sink twice.

WARNING: As with all wild food do not consume it unless you are 100% sure of what you are eating.


Tuesday, October 8, 2013

Say hello to my little friend(s).

The term “parasites” often relates images of tapeworms, head lice or other undesirable critters that children can bring home from school.  When a gardener thinks of the word parasite a much more pleasant image comes to mind.  We recently found this guy on our tomato plants.  He (or she) is a tomato hornworm (Manduca quinquemaculata) and can eat his weight in tomato plant and fruit every day.  He is a large caterpillar about the size of a bic pen only much more plump (and green).  All of the little white bumps are cocoons of a brachonid wasp called Cotesia congregatus (syn. = Apanteles congregatus).  These little wasps lay eggs under the skin of the caterpillar.  The eggs hatch and the larvae eat the large green caterpillar from the inside.  When they have had their fill they burrow through the skin to the outside of the hornworm and spin their cocoon where they emerge several days later. These cocoons are all of those little white specs that you see.  The cycle then repeats.  The more wasps, the fewer hornworms and organic gardening works at its maximum efficiency.  The beautiful albeit disturbing way of nature.

Monday, October 7, 2013

Grandma's Furniture part 2


During sanding pahse

If you read the first post about the furniture I inherited you knew that I had stripped, sanded, re-stained, and refinished a moderate sized dresser that I had inherited from my late grandmother. (see Grandma's Furniture)  It was part of a bedroom set that also included a full size bed as well as the following piece.
Door and Drawers after sanding
The second part of that bedroom set was finally completed last week and it also turned out quite well.  It is a smaller dresser of which I was repeatedly informed of its proper name - a "commode".  I was quite confused to this terminology, as I had always thought of a "commode" as a fancy french word for toilet.  It turns out it is a little of both.  According to definition a commode is a piece of 18th-19th century bedroom furniture where the chamber pot was kept. (see wikipedia reference)  Evidently out of sight out of mind and as long as one had some rosemary to cover the smell....no harm no foul.  However, we will probably not use it as a "commode" since we have a full bath adjoining the bedroom.  So from this point on it will be officially known as a small dresser.  At any rate, it is a very nice family heirloom as well as a once again beautiful piece of oak furniture.  Thanks grandma.
The finished "commode" now proudly sits in our bedroom.

Sunday, October 6, 2013

Rainbow Loom - Those darn rubber band bracelets


Maries used a butterfly case to store her bands.  Loom at top.

I've posted on facebook a couple of times wondering when this fad of rubber band bracelets took hold of our youth.  Like most kid fads it seems to have just simply appeared out of nowhere.  As far as kid fads go, this one is parent approved as far as I am concerned.  The rubber band bracelet phenomena is a crazy low tech, low marketing budget success story from the perspective of the company Rainbow Loom.  Marie used her birthday money to buy her loom at Michaels, but from my understanding nearly all of the hobby stores have them including Hobby Lobby and A.C. Moore.  Since her purchase she has made countless bracelets for herself, her friends and a few for her family.  As parents we love it.  It is not your typical consumerist fad where you have to buy more and more plastic flotsam made in China or trading cards with annoying made up animal species to keep up with the next kid.  Instead the kids buy a loom and some colorful rubber bands and CREATE.  The artistry is quite amazing considering 7-12 year old kids are the primary ones creating these bracelets.  Kids are using their hands, developing dexterity, using creativity and focusing on a single task for more than 5 minutes.  Something that we feel has been nearly lost with this new generation.  It is amazing as far as I am concerned.  It is targeted towards girls, but from the reports I have heard quite a few boys are into it as well.  I have been wearing one Marie made for me for well over a week.  This new found kid hobby also fits well into our lifestyle of crafty type folks.  Unfortunately, I foresee some issues mounting in the public schools in the near future.  Incidents of kids shooting each other with rubber bands, making bracelets too tight and losing circulation in their hands, choking hazards, etc.  BUT in the meantime the fad is in full force in the Philadelphia area and for those parents who are seeking a creative outlet for their children it should be a consideration.  Like I said, I am amazed at how viral this this has become as a kid hobby.  For anyone interested in the history of the Rainbow Loom or it's creator here is a link from the New York Times.


Saturday, October 5, 2013

HOMEMADE PIZZA ON FRIDAY, AN EGGERS' FAMILY TRADITION

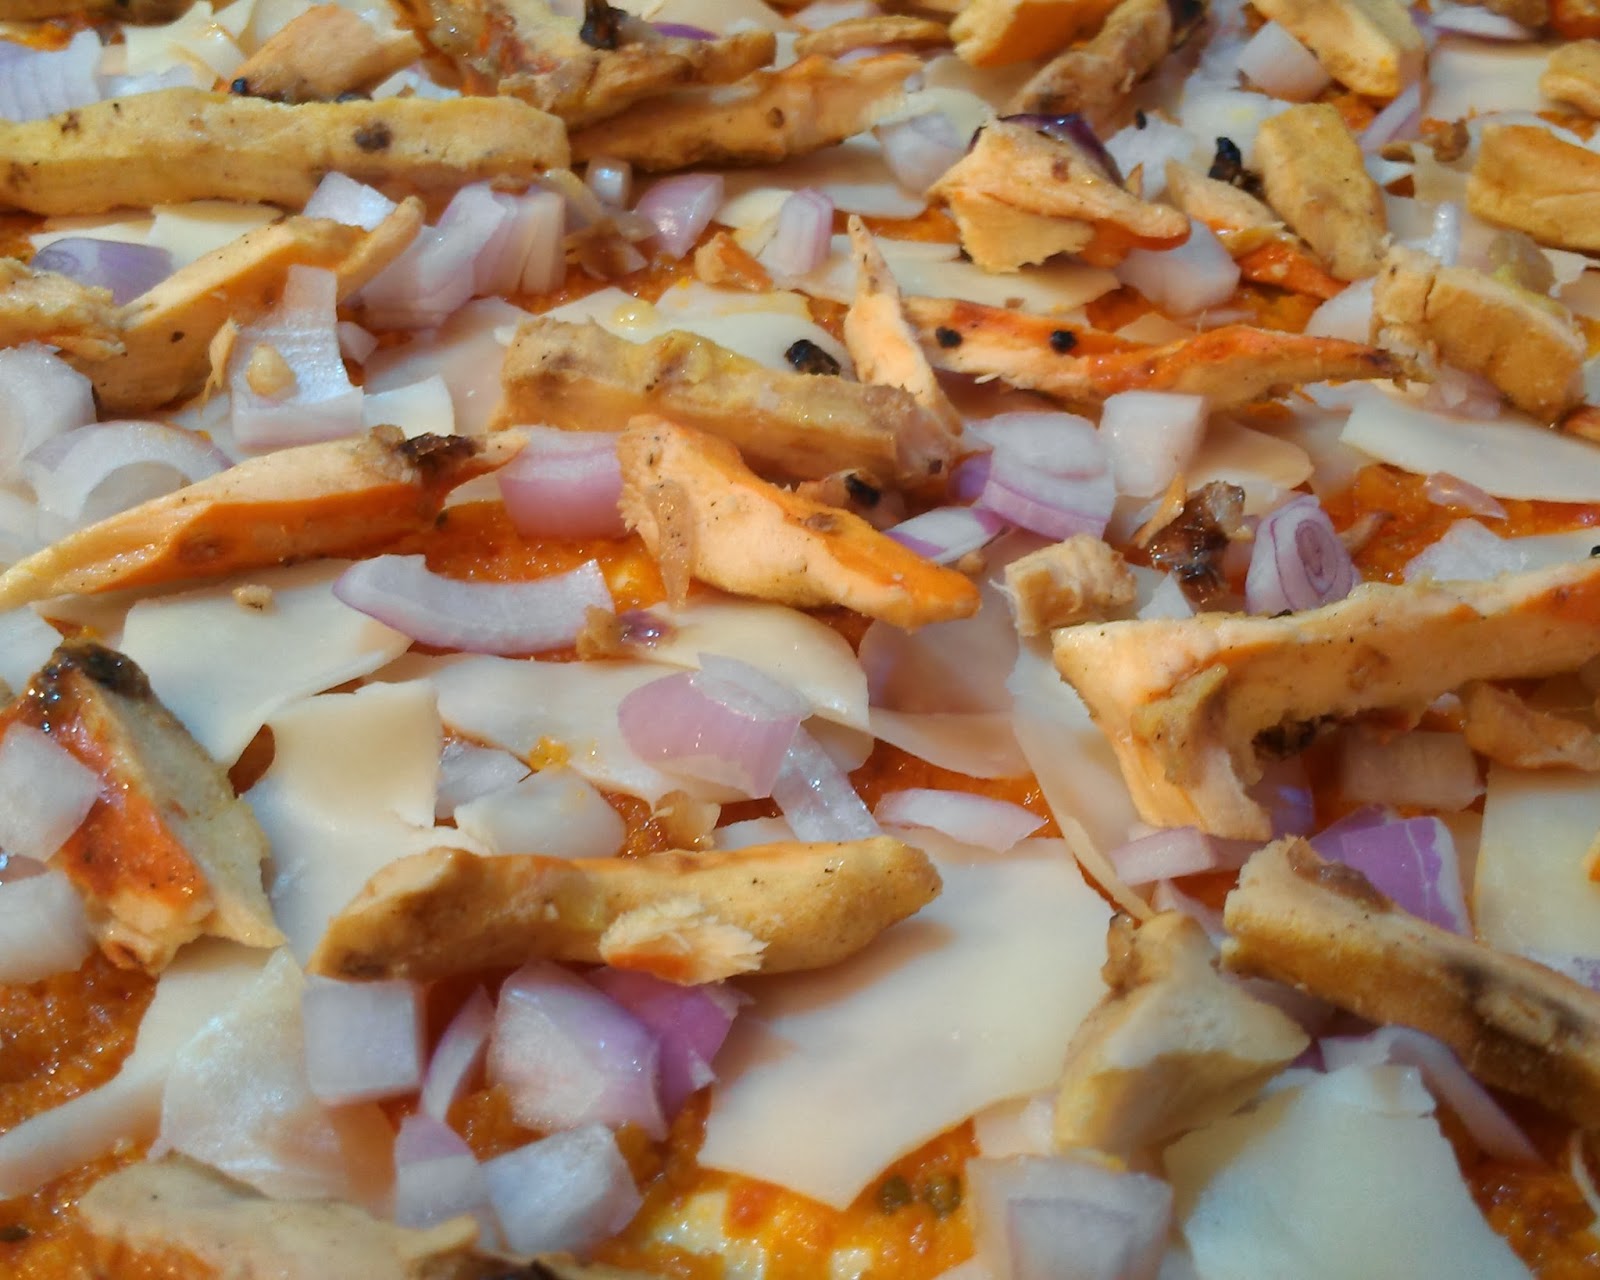
THIN CRUST WITH CHICKEN OF THE WOODS, BROCCOLI, ONION & BELL PEPPER
For the past five years we have had a tradition in our house of homemade pizza on Friday.

One of the more memorable pizza nights for me was on a Christmas Eve that had us snowed in at home.  That evening we had bread sticks dyed and twisted to look like candy canes along with the pizza.  It was a very cozy evening filled with love, smiles and warm comfort food. 

There have only been a handful of times when we have wavered from this custom.  Those occasions were always while we were far from home and were often met with stern discontent, especially on the kids' end.

We have made a fair amount of pizza and our recipe has developed into something we love to share with friends and extended family (even on non-Fridays!).  Typically we do not use the standard pizza toppings like pepperoni, black olive slices, etc., though if we have those things they go on there too.  A lot of leftovers are cut up and used as toppings.


Here are a few topping ideas:
NO NEED TO SHRED THE CHEESE


-bacon from Sunday brunch roughly chopped
-bits from leftover stew, strained a bit so it doesn't make the pizza dough soggy
-wild foraged mushrooms sauteed in onion and garlic
-fresh vegetables such as carrots, broccoli, halved cherry tomatoes, green beans, whatever is in the garden!
-meat ends bought from local deli (the ends of the lunch meat loaves that you can have sliced for you - check in the deli section where you shop, they may be sold for a reduced price!)
-cheese ends (same deal as meat ends)  they don't need to be shredded, just chop or tear them into bits
THE ABOVE PIZZA AFTER BAKING
-homemade tomato sauce...so easy and so good.
-pesto as sauce                
-precooked or canned beans
-chopped spinach or swiss chard
-cut up bratwurst and sauerkraut

PRETTY MUCH ANY LEFTOVER CAN BE USED TO MAKE GARBAGE PIZZA!


INGREDIENTS for PIZZA DOUGH:
(makes two pizzas)

1 packet or 1 Tablespoon yeast (technically one packet is 2 1/4 teaspoons but I eyeball and approximate)
1 Tablespoon sugar or honey
1 teaspoon salt
1 teaspoon lemon juice
1 1/2 cups whey or water, lukewarm
2-4 cups flour (to get correct dough consistency)

METHOD:

-If using whey that is stored in the refrigerator, heat it up to lukewarm for faster rising dough.  I put it in the microwave for one minute.
-Put all ingredients but NOT FLOUR into a food processor, stand mixer or bowl.  I use a food processor; use what you have and it will work!
-Slowly add flour, 1/2 cup at a time until the right consistency is reached.  When using the food processor I add flour until the dough turns around in a ball.  I flour my hands, remove the dough and test if it is too sticky or right on.*
-Turn off the food processor, flour your hands (to prevent sticking), remove the dough and form a ball.  Flour the outside and drop it back into the food processor for the first rise.
-Once your dough has risen (double in size is the standard) turn on your food processor to "punch it down" or reform a ball.
-Remove the dough, divide into two balls, dust the outer surface of each with flour and spread onto two oiled pizza pans.  Use your hands or a mini rolling pin to spread the dough.
-Allow the dough to rise again (can be used now if you are in a hurry).
-Top the pizzas.
-Bake 400 degrees F for 10-15 minutes (longer if you used toppings that are more wet).  I like to bake the first pizza 10 minutes, remove it and bake the second pizza for 10 minutes.  Then I reset the timer for 5 minutes and bake both pizzas together.  That way they are both warm and done at the same time.

 *This is the part, in my opinion, that really makes a difference in the finished crust.  Learning to identify when when the dough has the right amount of flour will be easier with practice.  The dough should be pliable, sort of rubbery.  If the dough is very sticky it needs more flour, if it is hard or flaky it has too much.  It is easier to add more flour than to fix dough that has too much flour, so add SLOWLY until you can ID your dough with confidence.


TONIGHT'S PIZZA with MEAT & CHEESE ENDS, GREEN BEAN, CARROT, BELL PEPPER & CHERRY TOMATO

Friday, October 4, 2013

Chestnuts gathered under an open briar

The chestnut tree


The spiny shell or fruit around the actual nut
looks like a hedgehog.
It turns out that there are two chestnut trees on the grounds where I work.  Recently I collected over 3 pounds of chestnuts in a matter of 15-20 minutes.  It was a nice day and I went for an after lunch walk as I sometimes do.  This gets me away from my cubicle and allows me to have a little fresh air.  I normally scrounge the grounds for potential forage from the numerous fruit and nut trees as well as mushrooms etc.  Normally I leave empty handed, but today I checked out the chestnut trees that I have been keeping an eye on.  There was a little older lady collecting fallen chestnuts when I arrived.  I talked with her a bit asked her name and where she was from.  It happens she is of Chinese descent but was born in Vietnam.  She was struggling to knock some of the prickly fruit from the lower branches.  It turns out we quickly developed a mutually beneficial relationship.  I was able to reach a few of the taller branches, grab a hold, and then shake many of the nut casing down to the ground, and she was able to explain to me the best way to prepare, store and collect them.  For those of you who have never seen the fruit on the outside of a chestnut I will describe it as looking like a green hedgehog or sea urchin.  There are an extremely large number of good sized sharp spikes conformed into a ball.  It is nearly impossible to pick it up with your bare hand unless you are willing to accept quite a large amount of pain.  The actual chestnuts are inside of this fruit.  The easiest way to extract them is to break the fruit apart with the sole of your boot exposing the inside.  The inside is smooth and once the outside is broken open the nuts are easily extracted.  This work provided me with an opportunity to talk with my new foraging partner who works in the neighboring building.  She told me that boiling them for 15 minutes will cook them and make them edible.  If I store them, keep them dry, but there will be more "skin" when I do cook them.  I assume this means that the husks or shells will get harder but am unsure.  I am not sure about what to exactly do with them yet, except maybe roast them.....on on open fire?  I can not wait to try them.

WARNING the chestnuts in the pictures are chinkapin or chinquapin chestnuts and should not be confused with the horse chestnut or buckeye, both of which are toxic.  This Asian chestnut is edible as is the American Chestnut that was once found in the Eastern US before the turn of the century.  The buckeye and the horse chestnut look different in regards to the fruit surrounding the nut as well as the leaf structure of the trees.  As with all wild food do not consume it unless you are 100% sure of what you are eating.    

Thursday, October 3, 2013

Things people throw away

We often find it simply amazing at the things people throw away.  Much of the furniture in our house has been rummaged from a garage sale or simply found along the side of the street awaiting the garbage man.  This piece is the newest acquisition.  We initially passed this beautiful piece along a busy road after visiting a friend in a nearby neighborhood.  We drove right on by it after one adult insisting to stop and look while the other insisted that we need to get home so the kids can get ready for bed.  The other seemingly more responsible adult won the coin toss and we continued on home.  Of course the first adult wound up driving back to take a look while the kids got ready for bed only to find an amazing 6 drawer chest with intricate hand painted oriental design on the veneer front.  The entire piece was solid veneered lumber – no MDF.  The only problem was that the first adult was now alone with a 100 pound piece of bulky furniture and his 2005 jeep liberty with the back seats already flattened out to make room.  How does one get this item into the vehicle by himself without scratching and ruining it?  The solution is quite simple; I had a piece of paper with Abraham Lincoln’s picture on it.  A passerby was more than happy to exchange 5 minutes of muscle power for this portrait of our 16th POTUS.  This young man was quite silent and I believe English deficient, but through the art of communication (facilitated by Mr. Lincoln) the dresser was loaded without a problem.  It now sits in our bedroom and has replaced our previous one that has been demoted to board game organizer in the game room.