A link to our Shop

At times we have to choose between the path that is conventional and the path that is not. In today's world that once worn path that our great grandparents traveled is so overgrown and forgotten that it barely exists. Our goal is to reforge that forgotten path and make it new again.

The Family Eggers

The Family Eggers

Thursday, October 31, 2013

Mr. Brown can Brew can You?


My primary fermentation
(6 gallon conical fermenter)


A 6 gallon glass carboy
used for secondary fermentation
I think everyone has the ability to brew a fine ale, even Dr. Seuss.  About two years ago I took up the hobby of home-brewing.  I had been interested for years but became inspired after meeting a coworker's husband who had been doing it for a while (Thanks Jason).  After “assisting” him with a batch I got the feel of it and tried my own.  In actuality, I sat around drinking beer while watching him scramble around the kitchen with his brewing equipment.  The process is incredibly simple and takes only a couple of hours of your time.  The initial investment into equipment can be as small as a 5 gallon bucket with lid, simple plastic tubing, a large kitchen pot and refillable bottles, though most people will quickly upgrade after starting.  There are hundreds of little things you can do to improve your brew along with a plethora of ingredient additives to make your brew unique.  There are different yeasts, grains, hop varieties and malt extracts that can be used in various combinations.  The possibilities are nearly limitless.  If however, you are slightly less adventurous, there are pre-made kits and recipes at nearly every homebrew supply store.  I normally work from a kit, though I do sometimes venture out on an experiment or two.
There are numerous websites and books about home brewing and rather than bore you with details, here is a link for the basics written far better than I ever could (see link).  Most brewing kits have step-by-step instructions and every home brew supply store that I have ever been to has always been helpful with any questions I have had.

I’ll include some pictures of my brewing equipment.  Stay tuned for reviews of my upcoming pumpkin brew That we just bottled.

Me bottling beer and reusing a Corona bottle
My capper. Works excellent.

Tuesday, October 29, 2013

Boletes


Bolete species growing under a pine in October.  Notice the pine needles.
We have recently expanded our mushroom foraging species list to include Bolete species.  Until now we have avoided most ground mushrooms, especially those with the traditional mushroom shape.  Most of the toxic species of mushrooms are the ones that grow directly on the ground.  Through reading and internet research we were able to positively identify the bolete family of mushrooms and realized that the vast majority of boletes are edible, with only a few exceptions.  Boletes are easy to identify, relatively safe, and very tasty.
Smaller boletes.  Notice the yellow pores under the cap.

How to identify a bolete:  The family of bolete mushrooms have pores instead of gills under the cap.  Simply pick the mushroom and flip it upside down.  Gilled mushrooms will have radial gills looking like spokes of a bicycle wheel.  Boletes will have pores that look like a sponge.

The poisonous boletes:  All texts agree that the toxic boletes share one or both of the following characteristics:

#1 The pore surface under the cap will be red or orange.   
#2 The flesh will stain blue or purple when bruised or cut.  

All the toxic species of bolete mushrooms have one or both of these characteristics.  That does not mean that just because a bolete stains blue or has reddish pores it is toxic, but it is a good starting point to exercise a lot of extra caution.  If neither of the above criteria are met, the mushroom is safe.

Just because it is safe to eat, it still may not be palatable.  There are a lot of bitter boletes out there that while technically safe to eat, a person probably would not want to due to flavor.  This is why it is still advisable to figure out exactly what it is that you plan to eat.  This includes identifying the species of bolete you plan on eating.  It is also advisable to try a small sampling of mushrooms prior to eating them just in case.  

Boletes can be sauteed with butter or oil, baked or even grilled.  They can be preserved by freezing, dehydrating, or even pickling. 

Warning: As with all wild foraged food do not eat anything unless you are 100% sure what it is and how to prepare it.  When in doubt throw it out.

Saturday, October 26, 2013

The Bearded Tooth


   I found this beauty while taking a quick walk in a wooded area.  He was on the end of a decaying log and though I was looking primarily for sulfur shelf, this was a nice consolation prize.  The bearded tooth mushroom is one of those oddities that a shroomer comes across once in a while, even if he/she is not looking for it.  Also known as the Lion’s Mane,  Bear’s Head Tooth, and Comb Tooth it has a very distinctive look.  It is in the genus Hericium and some texts say there are three separate species and these are nearly indistinguishable from each other.  It is very distinctive and nothing looks quite like it.   There are no poisonous look alikes and is considered a choice edible by many.  With no poisonous look alikes, an excellent forage mushroom for beginners.  We find it a strong tasting mushroom, and the texts say younger specimens are bland with older specimens becoming sour.  Perhaps we are getting older specimens or not preparing them soon enough, but we find this mushroom pleasant overall even if it has a strong flavor.
   We wound up sauteing him and some puffballs in olive oil with some garlic and onion.  We mixed in a few green tomatoes and peppers from our garden all in a curry sauce.  We had this concoction over some brown rice...delicious.

As with all foraged foods, do not eat anything unless you are 100% sure of what it is.

Friday, October 25, 2013

IS THAT MUSHROOM SAFE?


IS THAT MUSHROOM SAFE?


Sulfur Shelf or Chicken of the Woods  (Edible -Choice)
The question and concern from family and friends when we tell them we forage for mushrooms (and other food) is sometimes overwhelming.  Though we appreciate the concern, we sometimes wonder why.  It is probably because of the lore behind mushrooms killing the unsuspecting person, or portrayal by the film industry with the assassin posing as a chef feeding his target a poisoned mushroom soup.  There is also the occasional report of a child (or drunken adult)  unsuspectingly eating mushrooms from the yard and ending up in the emergency room.  While all of these situations are plausible and can happen, they are all easily avoidable.

Though it is true that toxic and even deadly mushrooms are quite common, some basic safety tips will avoid poisoning for you or your family.  We are specifically talking about mushroom foraging, but the same rules apply for plant foraging.  
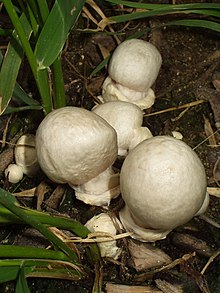
#1:  Do not eat anything if you are not 100% sure what it is.  We continually say this as does every person and book that teaches foraging.  It is the #1 most important rule….positive identification.  There are numerous field guides, identification guides and internet sites available.  A google search of foraging clubs and classes in your area can also be helpful to attend or join.  WHEN IN DOUBT THROW IT OUT!   

Destroying Angel (toxic / deadly)
 #2:  Know what NOT to eat!  Knowing what is toxic is probably more important than knowing what is edible.  If we think back to childhood, this was a basic premise that are parents instilled.  Stay away from things you know can harm you.  In the case of mushrooms, there are really only a few species that are truly deadly and a handful of others that will make you sick.  Learn how to identify these first.
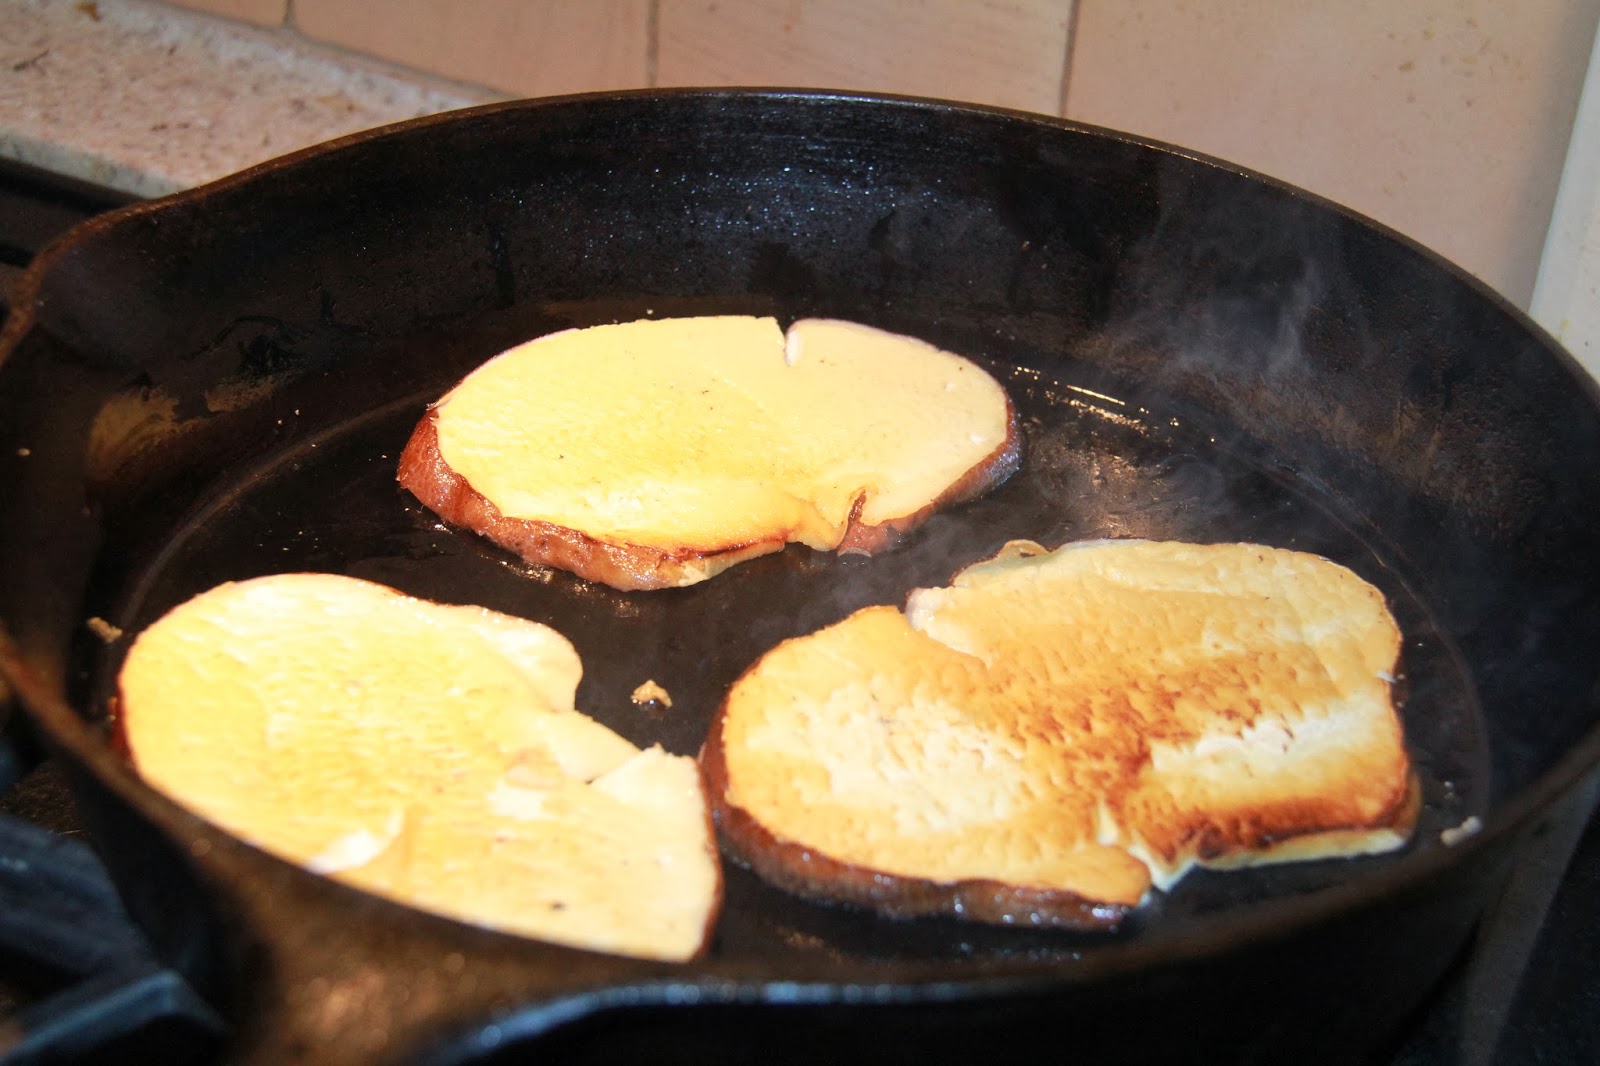
#3:  Nearly all wild mushrooms need some processing before being consumed.  Most should be cooked whether by frying, boiling, baking or grilling.  Many can be dehydrated or pickled and a few can be frozen to be later used in your favorite dish.  Many field guides and internet sites have recommendations for preparation.    

#4:  Try only a small sample or taste the first time you try a new type of mushroom (or foraged food).  Wait at least 24 hours before consuming more (some guides recommend waiting 48 hours).  Even if you are sure about the mushroom (or any foraged food) you have, some people can adversely react.  Some wild mushrooms may not affect one person, but make the next person ill.  All people are not built the same in regards to what they can and cannot eat. 

If a person follows these basic rules, a safe and happy foraging experience will be the outcome.   Our ancestors followed these rules and most lived long happy lives.  There is a valid argument as to whether eating these "back to nature foods, could actually mitigate many of the chronic illnesses we have in the modern world.  Anecdotally, we have noticed a significant reduction in some of our minor chronic health issues over the past few years including allergies and gastro-intestinal problems.  This increase in health has coincided directly with our increase in dietary variability including wild and foraged foods.  We feel better physically and feel better socially by not contributing to the over-processed food industry.

Thursday, October 24, 2013

Anabaena Picks a Tomato

Anabaena ate a tomato
she picked it without my say-so
it looks rather sour
her expression is dour
perhaps it just needs some pesto


"Chillax" by Almira Fawn

Wednesday, October 23, 2013

Vitamix - Pecan Butter

Move over peanut butter!  I don't say that lightly; I love peanut butter.  Love, love it.  However, pecan butter made a recent arrival into my life and I now have a new object of culinary ardor.

I've made peanut butter and almond butter successfully.  I have a bag of pecans.  I also have a Vitamix blender (awesome, by the way).  Naturally, I made pecan butter.  There really was no getting out of it.

I didn't expect to be amazed by the outcome, but not only am I impressed with pecan butter, Joe loves it too.  Joe likes peanut butter, but not with the same vehemence that would drive me to eat it with a spoon from the jar.  Plus, Joe doesn't really like pecans.  There is something about pecans that makes him skip over them in a bowl of mixed nuts.  So when I announced that I had made pecan butter he shrugged and nonchalantly accepted the sample I held out to him.  He looked at me wide-eyed and said, "that's pecan butter?  Really?  It's amazing!".

If you want a truly amazing sandwich, pecan butter and pear jam on homemade bread is true bliss.


Pecan Butter:

3 cups pecans, unsalted
in the blender with a tamper
4 teaspoons olive oil

 Place oil and pecans in a food processor or blender.  If your blender has a tamper, use that.  Blend on high in short intervals to prevent the blender from overheating.  Blend until smooth.  Pecan butter is drier than peanut butter, adding oil will make it more spreadable.  Add the oil a little at a time to achieve the smoothness you desire.  The 4 teaspoons was great for me, I could have stopped at 3 and I would have been happy with that too.  How much oil you add will depend on how fine your blender processes the pecans as well.     


It may not look like much, but it's fantastic!
           

Tuesday, October 22, 2013

A Mean Mustard


Look at that mustard, grrr!
After Mackenson's repeated requests for mustard on his sandwiches in his lunchbox, I decided to try my hand at a homemade version.

We made a few batches before getting a mustard that has a creamy texture and sharp but smooth taste.  It is strong and tangy, but slightly sweet and spreads across the slice of bread like a dream.  In short, we make a mean mustard.


Homemade Dijon Mustard:

6 Tablespoons vinegar
4 Tablespoons mustard seeds
2 Tablespoons horseradish root, shredded
2 teaspoons maple syrup
Pinch turmeric


Place vinegar, mustard seeds and horseradish in a blender.  Process on high until desired consistency is reached.  You may want to add either more vinegar or mustard seeds, depending on the thickness you would like your mustard.  Add the maple syrup (or honey) and turmeric and blend until incorporated.  The sweetness of the syrup is the perfect compliment to the sharpness of the mustard.  Use a spatula to scrape the mustard into a jar and store in the refrigerator.  The above recipe fit into a re-purposed pesto jar, which is about 6 ounces.

Your local Asian food market may the best place to find mustard seeds and turmeric powder.  We used the dark mustard seeds, which have a sharper taste than the lighter ones.  Either type, or a mix, would work well in this recipe.

Monday, October 21, 2013

The Loom


Current project

One of the things we acquired at the recent Mother Earth News Fair we attended in September was a loom made by Lost Pond Looms.  The loom is a wonderful simple tool that takes very little skill and has a high reward.  I love hand woven wares and have a mild fascination with the process of weaving for quite a while.  I went out of my way to purchase several hand-woven Persian rugs during the time I spent in Kuwait, Qatar and Iraq.  Another favorite is a hand woven wool rug / tapestry with a southwest theme I picked up in New Mexico.  Though no one in the family is ready to begin an epic project of a fine silk carpet, we are making some really nice small pieces.  We are starting with woven dish towels and bags.  The results are very nice, very versatile, very usable and aesthetically pleasing.
Our 1st project.  We are using this beauty as a dish rag.
None of us may ever become master weavers, but as far as making something that we all like I think the new loom is a very useful tool that anyone can use.
The Loom.

Sunday, October 20, 2013

CPT SCARE

For this year's scarecrow we decided to go with a slightly different theme.  Last year was the first year we made our family scarecrow for Halloween and Thanksgiving (see post).  We went with the traditional coveralls and flannel shirt.  This year the kids found a set of my old Army uniforms and suggested an Army theme.  My old BDUs (Battle Dress Uniform) was still on the hanger, perfectly pressed and starched.  In other words, it was in perfect shape to be stuffed with straw and thrown out into the elements.  The kids suggested the name CPT Scare.  We had a lot of fun putting CPT Scare together.  He now proudly stands in our front yard with his right hand in a pseudo salute to the passers by.


THE LONE MELON

We planted one watermelon plant and a few cantaloupe on our straw bale garden.  For most of the summer our watermelon and muskmelon vines were a disappointment.  In August we noticed that a single watermelon developing well.  This was a nice surprise considering all of our cantaloupe vines on the straw bales only produced softball sized melons.  We got around to picking this watermelon about a week ago after it finally ripened.  This was the very last item harvested from our straw bale garden and was well worth the wait.  Our first taste was with one of our chestnut meals (see post).
 

Friday, October 18, 2013

Puffballs; The Gift


Word of our foraging is slowly expanding to new horizons.  Last week we were talking with a new-found friend (HI MANDI) and telling her about our foraging.  This week she brought us THREE puffball mushrooms of varying size that she had found in a local park.  After some quick research we deduced that they are in fact the purple spored puffball or Calvatia cyathiformis.  There are no poisonous look alikes (see bottom of post) so we went ahead and prepared a few for an evening snack.  We simply pan fried a few to see what they tasted like.  To our joy and amazement they are absolutely delicious.  It is very difficult to compare the taste to anything else, but they have a sweet and savory flavor.  We pan fried (sauteed) and froze what we were not going to eat immediately, and will have the rest with or on our Friday night pizza.  We want to give a big shout out to Mandi.  We owe you (and your husband and kids if you choose) a 6 pack of beer, some handmade soap and maybe even a dinner at our place sometime.  Even when we give you all of these things, we will still get the better part of the deal.  These are quite possibly the best mushrooms ever to cross our palates.


Puffball mushrooms are large mushrooms found in midsummer into the fall.  Large puffballs such as the "Giant Puffball" and "Purple Spored Puffball" can get the size of a soccer ball.  Most puffballs are edible except the "Pigskin Poison Puffball."  The "Pigskin Poison Puffball" will have a dark purple to black center when cut into.  All other puffballs are edible as long as the inside flesh is white.  When a puffball ages the white flesh will turn orange to green and will be past its prime.


Warning:  Though puffball mushrooms are ideal for beginning shroomers, there are a few easy ways to avoid mixing them up with anything else.

Puffballs smaller than a fist  could be confused with immature Amanitas (poisonous), but are easily distinguished when cut into.  The puffballs will have no evidence of an internal stem and no gills.  Amanitas have both.

Poisonous Earthballs  (Scleroderma species) are very hard and are black on the inside unless very young.  Puffballs are quite soft throughout there life.

REMEMBER:  Internal white flesh means you have a treasure to tempt your palate when dealing with puffballs.


DISCLAIMER:  As with all foraged food do not eat anything unless you are 100% sure what it is.  This is especially true with mushrooms.  We highly recommend you get some good field guides and take foraging or mushroom classes if available before starting on your foraging journey.  It can be (and is) a highly rewarding experience, but caution must be exercised for safety reasons.